Vue3学习(十一)之 table表格组件的使用
时间:2021-12-04 作者:longronglang
一、前言
大约有两周没学习更文,不是懒,而是没心情,相亲路屡战屡败,着实很影响心情。

我想这世上对我而言,最难的事,莫过于恋爱结婚了,再一次经历了见光死的高光时刻。
二、又见Ant Design Vue
在大量数据需要展示时,我们一般都会以报表的形式展现,按照直觉习惯,肯定使用table表格来展示行列数据。
因此,我们要使用Ant Design Vue组件库中的table组件,来进行数据的绑定。
1、官网地址
官网地址:https://域名/components/table-cn#API
2、怎么使用
我们先对电子书管理页面改造,将布局进行调整,示例代码如下:
<template>
  <a-layout class="layout">
    <a-layout-content
        :style="{ background: \'#fff\', padding: \'24px\', minHeight: \'280px\' }">
      <div class="about">
        <h1>电子书管理页面</h1>
      </div>
    </a-layout-content>
  </a-layout>

</template>
效果如下: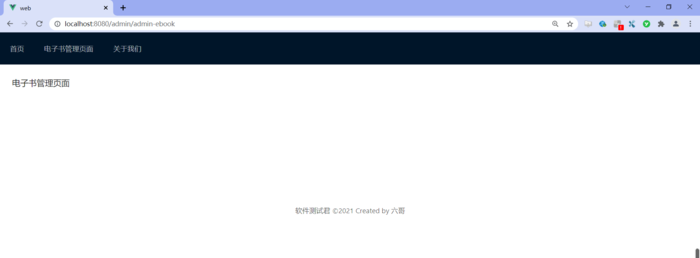
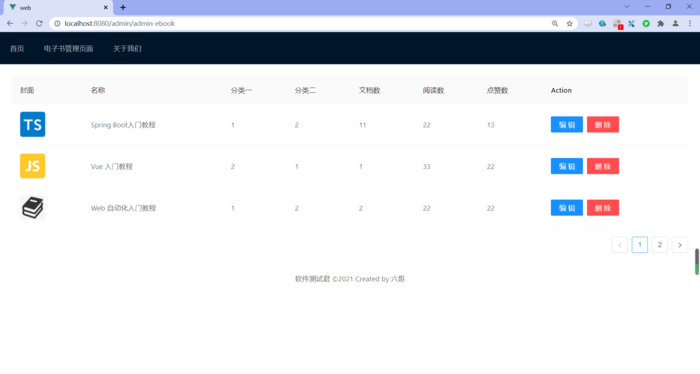
3、将电子书表格进行展示
要做的事:
- 表格渲染
- slots: 自定义渲染
- title: 表头渲染
- customRender: 值渲染
示例代码如下:
<template>
  <a-layout class="layout">
    <a-layout-content
        :style="{ background: \'#fff\', padding: \'24px\', minHeight: \'280px\' }">
      <a-table :columns="columns"
               :data-source="ebooks1"
               :pagination="pagination"
               :loading="loading"
      >
        <template #cover="{ text: cover }">
          <img v-if="cover" :src="cover" alt="avatar"/>
        </template>
        <template #name="{ text: name  }">
          <a>{{ text }}</a>
        </template>
        <template #customTitle>

      <span>
        <smile-outlined/>
        Name
      </span>
          </template>
          <template #action="{ record }">
      <span>
        <a-space size="small">
            <a-button type="primary" @click="edit(record)">
              编辑
            </a-button>
             <a-button type="danger">
                删除
              </a-button>
          </a-space>
      </span>
          </template>
      </a-table>
    </a-layout-content>
  </a-layout>

</template>
<script lang="ts">
import {SmileOutlined, DownOutlined} from \'@ant-design/icons-vue\';
import {defineComponent, onMounted, reactive, ref, toRef} from \'vue\';
import axios from \'axios\';

export default defineComponent({
  name: \'AdminEbook\',
  setup() {
    const pagination = {
      onChange: (page: number) => {
        域名(page);
      },
      pageSize: 3,
    };

    const loading = ref(false);
    const columns = [
      {
        title: \'封面\',
        dataIndex: \'cover\',
        slots: {customRender: \'cover\'}
      },
      {
        title: \'名称\',
        dataIndex: \'name\'
      },
      {
        title: \'分类一\',
        dataIndex: \'category1Id\',
        key: \'category1Id\',
      },
      {
        title: \'分类二\',
        dataIndex: \'category2Id\',
        key: \'category2Id\',
      },
      {
        title: \'文档数\',
        dataIndex: \'docCount\'
      },
      {
        title: \'阅读数\',
        dataIndex: \'viewCount\'
      },
      {
        title: \'点赞数\',
        dataIndex: \'voteCount\'
      },
      {
        title: \'Action\',
        key: \'action\',
        slots: {customRender: \'action\'}
      }
    ];
    //使用ref进行数据绑定
    const ebooks = ref();
    // 使用reactive进行数据绑定
    const ebooks1 = reactive({books: []})
    onMounted(() => {
      域名("/ebook/list?name=").then(response => {
        const data = 域名;
        域名e = 域名ent;
        域名s = 域名ent;
      })
    })
    return {
      pagination,
      loading,
      columns,
      ebooks1: ebooks,
      ebooks2: toRef(ebooks1, "books")
    }
  },
  components: {
    SmileOutlined,
    DownOutlined,
  },
});
</script>
<style scoped>
img {
  width: 50px;
  height: 50px;
}
</style>
实际效果:
三、写在最后
对于table组件的使用不是很熟的话,需要不断去尝试,简单说,就是对象属性的映射。
总体感觉下来,还是进行数据绑定后,在进行页面展示,如不是很清晰,请参考这篇《Vue3学习(七)之 列表界面数据展示》文章。